Trinity Lutheran Church - Thief River Falls, MN
Organ Restoration Blog - Most recent posts are at the top of the page.
Moe Pipe Organ Website - Click here
________________________________________________________________________________________________
9/19/08
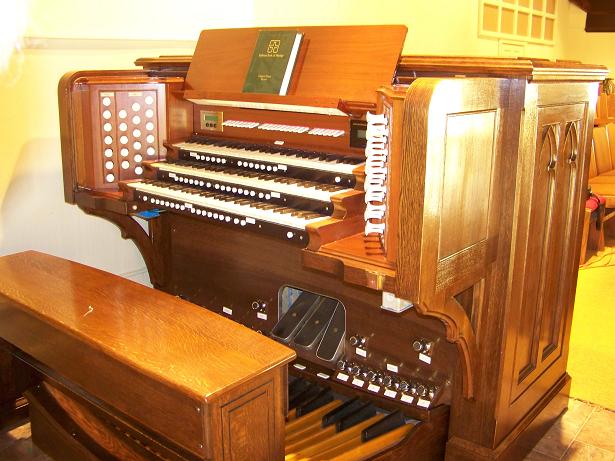
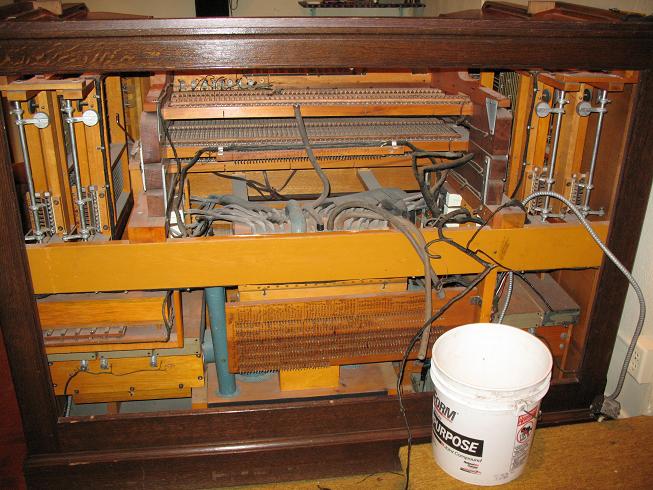
The installation is complete! This is the console after restoration. Click here to listen to this organ. Appologies for the out of tune-ness of the recording. The temperature fluctuations in the church wreaked havoc with our tuning.
________________________________________________________________________________________________
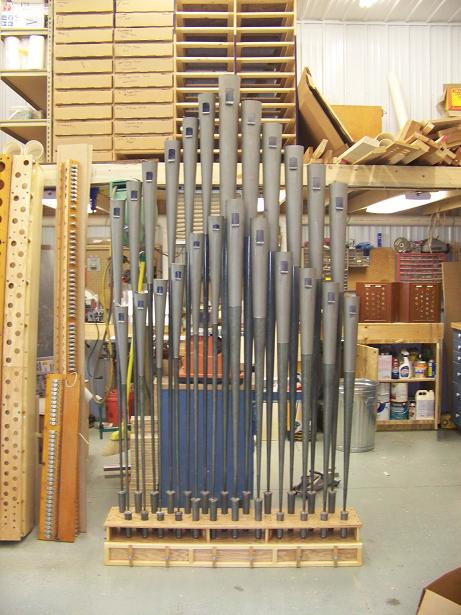
9/19/08

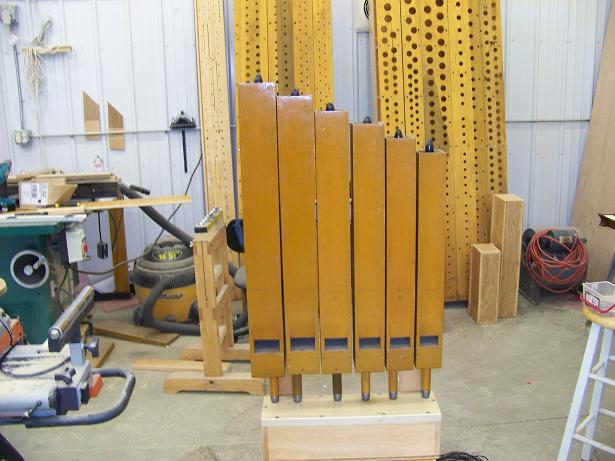
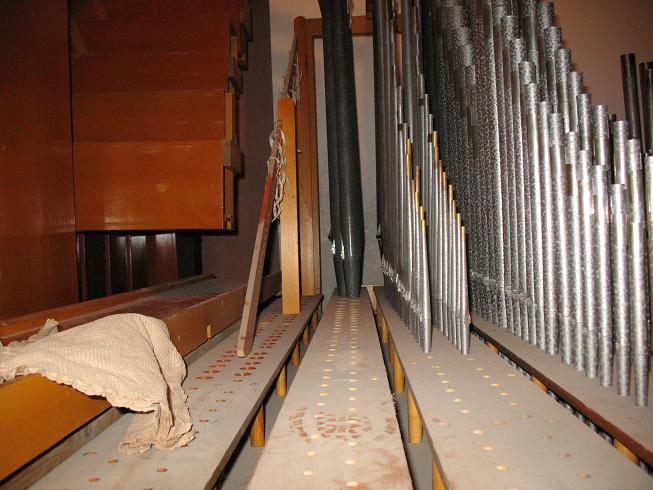
These are the pipes of the swell chamber. The largest pipes of the Trumpet and Oboe have been moved to a new offset to facilitate access to the other pipes of this chamber.
________________________________________________________________________________________________
9/19/08

Here are the pipes of the great organ reinstalled in the chamber. This organ was once installed in much smaller chambers and that is the reason that some pipes are "mitered" at the top. The gold tubes towards the back are the chimes which were relocated from the original location to allow better access for tuning.
________________________________________________________________________________________________
9/6/08
Click here to see how we clean the pipes of the Trumpet, Oboe, and Clarinet.
All is complete and loaded in the trailer. Work will begin in the church on Monday the 8th.
________________________________________________________________________________________________
8/29/08
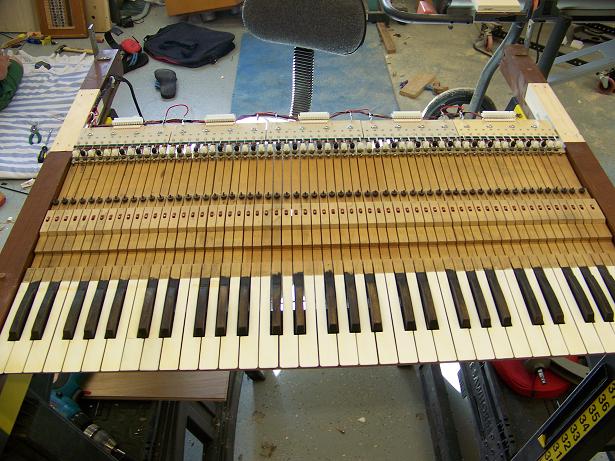
Here is one of the manual keybaords after the keys have been cleaned and polished. Some of the ivory has been replaced that had the worst water damage. The new silver wire key contacts have been installed as well. This is the beige unit toward the back ends of the keys.
________________________________________________________________________________________________
8/29/08
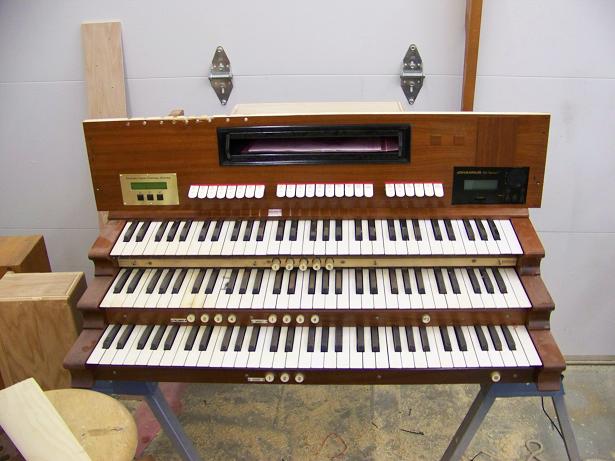
Here is the tablet board installed on the manual stack after the new stop tabs, control panel, and MIDI sequencer have been installed. The black unit at top center is a compartment for storing the operating manuals for the organ.
________________________________________________________________________________________________
8/29/08
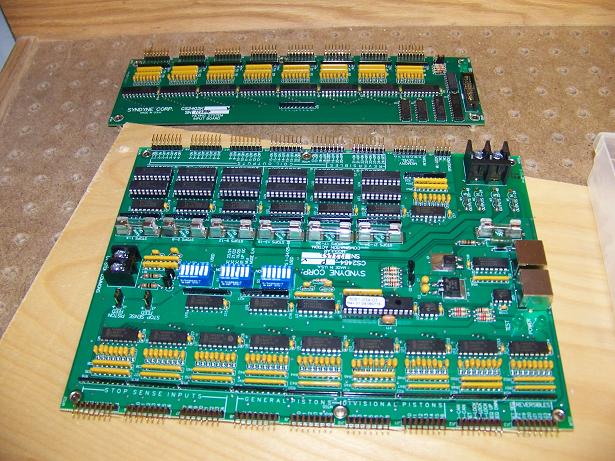
These are some of the new solid state circuit boards for the console. The large one is a combination action memory board. There is one for each division of the organ. The smaller board is a key encoder board which connects one manual keyboard to the main console computer.
________________________________________________________________________________________________
8/29/08

All the wiring harness for the organ console are run with nylon coated wire and one wire at a time. There are over 1000 connections required for the new electrical system in the console. This is a wiring harness on the form for the stops of the choir division.
________________________________________________________________________________________________
8/22/08

Here are the new stop knobs installed in the side jambs. The new machinery for the stops is also installed on the back side.
________________________________________________________________________________________________
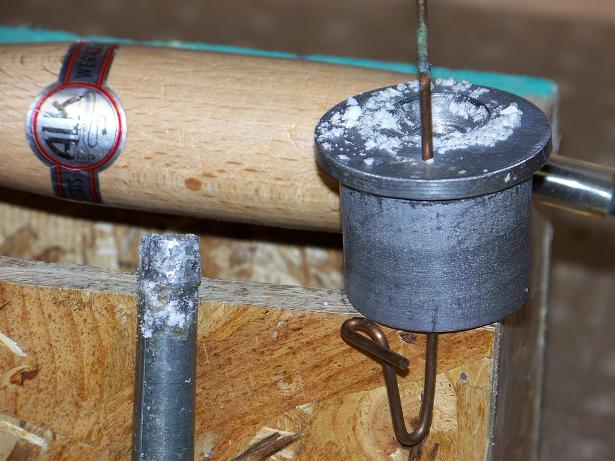
8/22/08

Here is the repaired pipe. Once the solder and the lead block of the pipe have cooled all that remains is to clean off the wax.
________________________________________________________________________________________________
8/22/08
The parts of the pipe are soldered back together with a special soldering iron designed for use on organ pipes.
________________________________________________________________________________________________
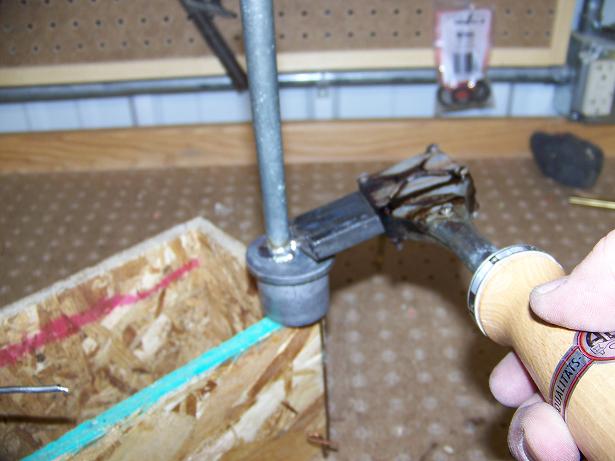
8/22/08
First the old solder is cleaned off and the parts to be joined are coated with steric acid wax which acts as a flux. The metal content of the pipe and of the solder are basically the same so there is a fine line between repairing the pipe and melting it into a useless lump of metal.
________________________________________________________________________________________________
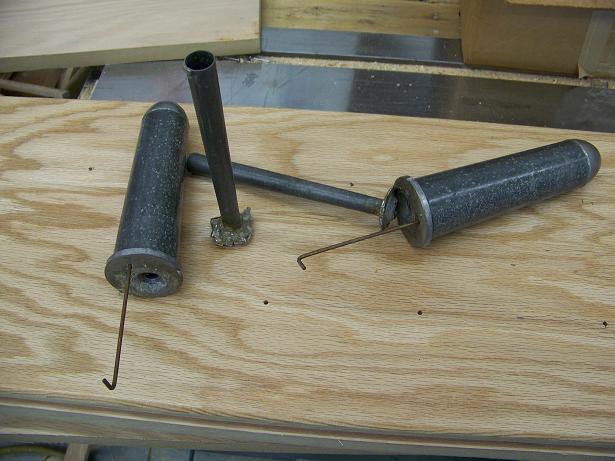
8/22/08
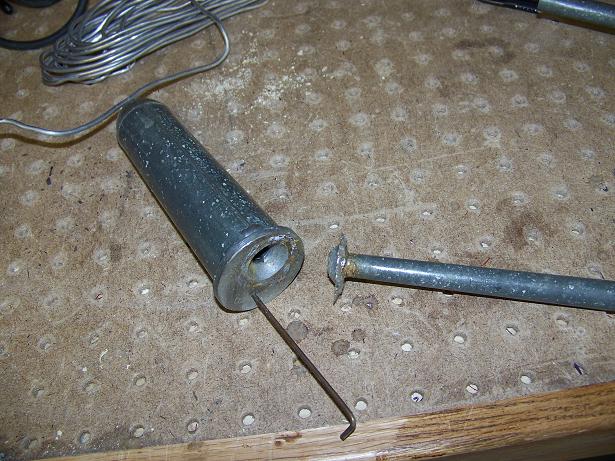
The following pictures will show the repair process of a broken Oboe pipe. There were several pipes in this rank that were broken like this due to overcrowding on the main swell windchest. These pipes are now going to be on the new offset windchests shown below.
________________________________________________________________________________________________
8/20/08
These are the bottom 6 pipes of the Stopped Diapason in the Choir. They are on a new offset windchest to allow more room for access. They were originally installed on the main choir windchest but due to their large size the caused very crowded conditions.
________________________________________________________________________________________________
8/20/08
All the windchests have been wired and assembled. This is the new offset for the bass pipes of the trumpet and oboe with the pipes standing on the chest.
________________________________________________________________________________________________
8/12/08
Wiring has begun! Here are some of the new chest magnets after being wired.
________________________________________________________________________________________________
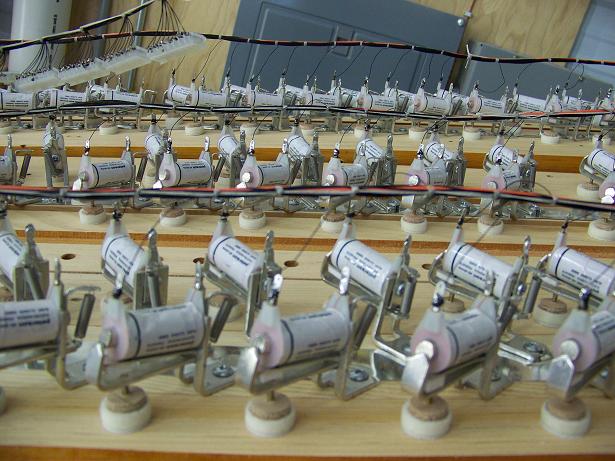
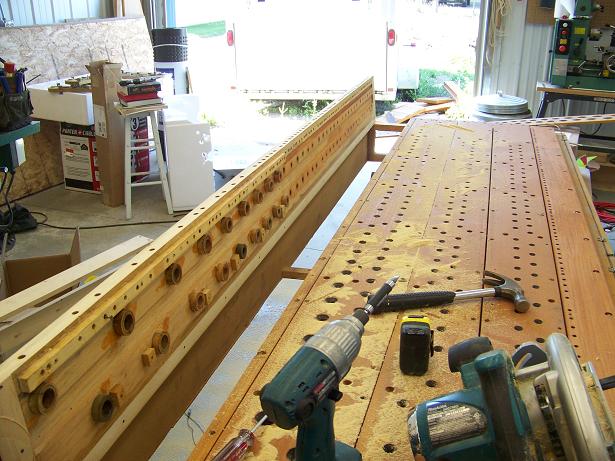
8/7/08
Here are the original toe boards after having the new valves mounted to them. There is one valve (small white devices) for each pipe in the organ. Approximately 1200 in all. Next is wiring and assembly. The solid state driver circuit boards which will operate these valves are also installed inside the windchests. This allows for a small telephone cable to be the only wiring leaving the windchests. Originally there would have been a large cumbersome cable with one wire per valve.
________________________________________________________________________________________________
8/7/08
This is the new offset chest for the bottom octaves of the trumpet and oboe. Note the access doors on the front. These allow easy acces to the interior of the windchest for servicing. As this chest sits on the floor it is not possible to enter through the bottom as with the large main chests which you can see agains the wall in the background.
________________________________________________________________________________________________
7/31/08
Appoligies for the lack of posts lately. I have been busy applying the clear finish to the various windchests. The new electric chest valves arrived today and just in time to be installed into the windchests and wired. This picture shows a couple of boots from the Swell 8' Oboe which are damaged. At some point in the past someone attempted a rather amaturish repair. These will be repaired and placed on the new offset windchest with the bottom of the trumpet so that this won't happen again.
________________________________________________________________________________________________
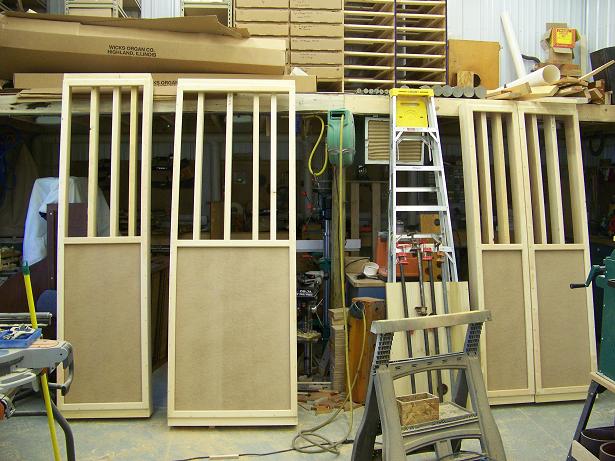
7/22/08
The main windchests are now complete and are awaiting a clear protective finish.
________________________________________________________________________________________________
7/22/08
This is the new offset windchest for the bottom octaves of the 8' Trumpet and 8' Oboe in the Swell division. These pipes were originally located on the main windchest but due to poor layout of that windchest the pipes were very crowded which caused speech issues and made tuning very difficult. These pipes and their new windchest will now stand on the floor off the end of the main windchest. Since offset chests typically sit on or very near the floor, they do not have removable bottom boards. Instead, the front boards are made to be removable for access to the machinery inside.
________________________________________________________________________________________________
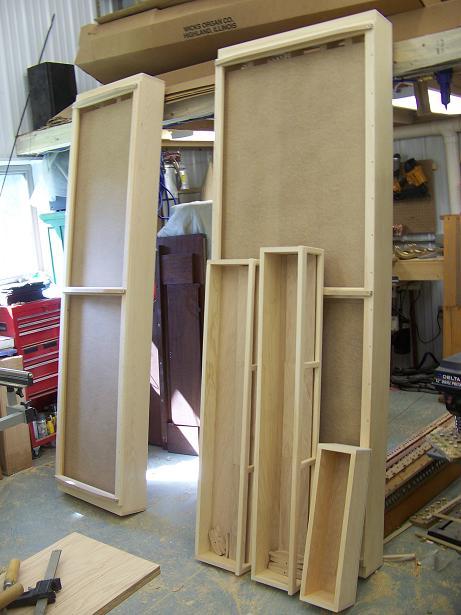
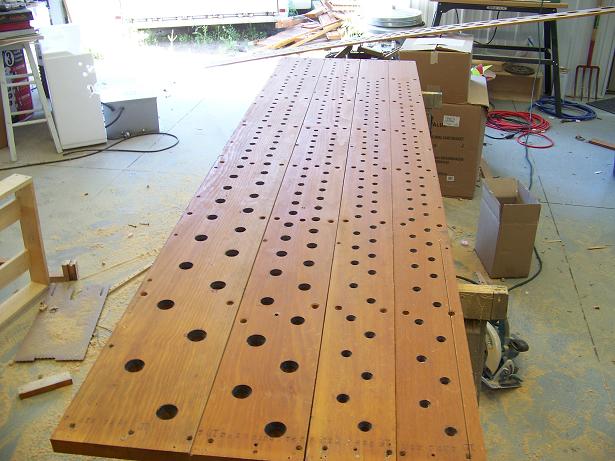
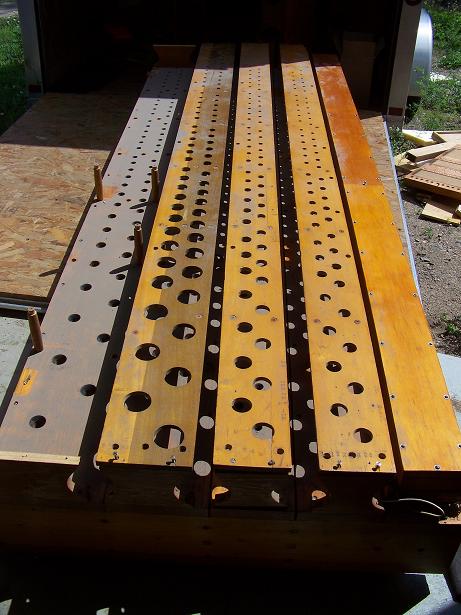
7/18/08
Here are the three new windchests completely assembled. The darker colored panels at the bottom of the picture are the bottom boards of the wind chests. These boards function somewhat like sliding cabinet doors and lay against a felt-gasketed framework on the bottom of the chest to create an airtight seal when the wind chests are pressurized. If it becomes necessary to gain access to the interior of a windchest for repairs, all you need do is turn the wind off and slide one of the panels out of the way. No screws to remove, replace, or get stripped out!
________________________________________________________________________________________________
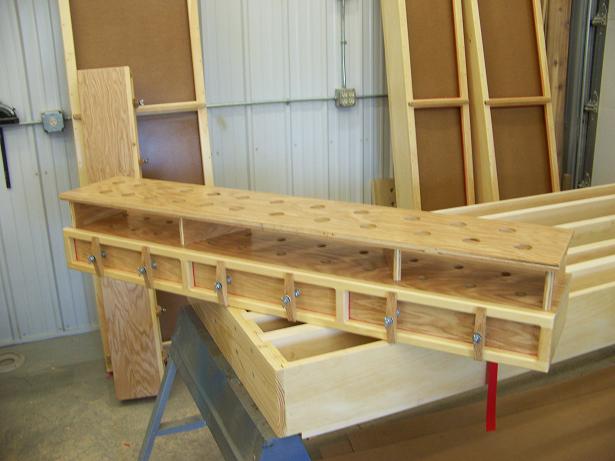
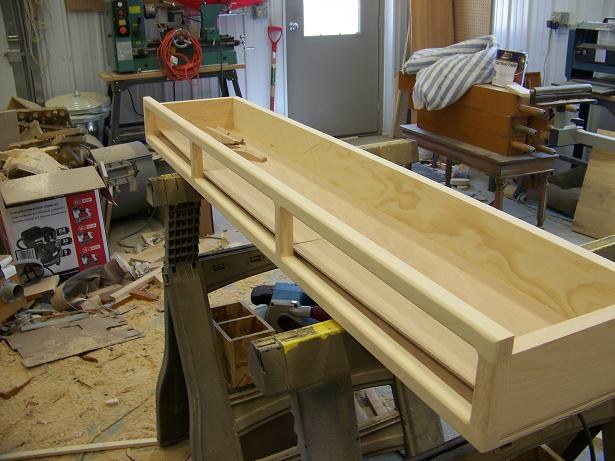
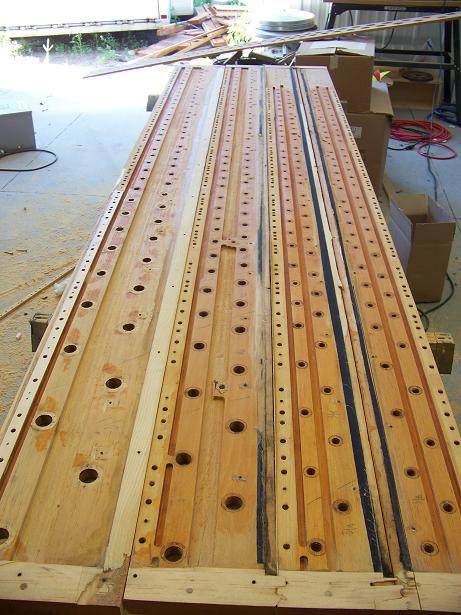
7/18/08

This is one of the windchests for the swell division after being glued up. Each slot in the top of the chest will receive one of the toeboards from the old windchests.
________________________________________________________________________________________________
7/18/08
These are the end pieces of the windchests. Dado and rabbet joinery is used to create a stong structure to support the weight of the pipes.
________________________________________________________________________________________________
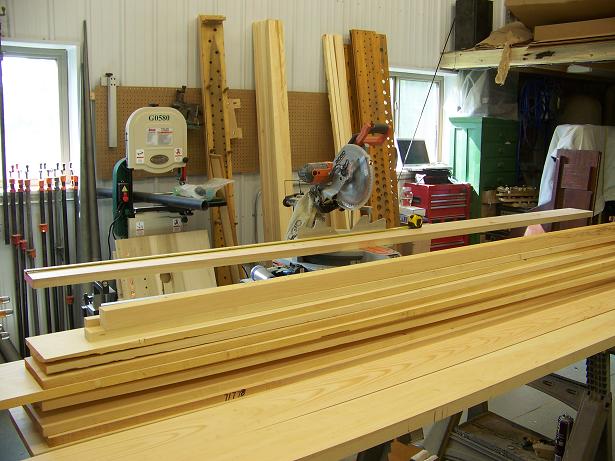
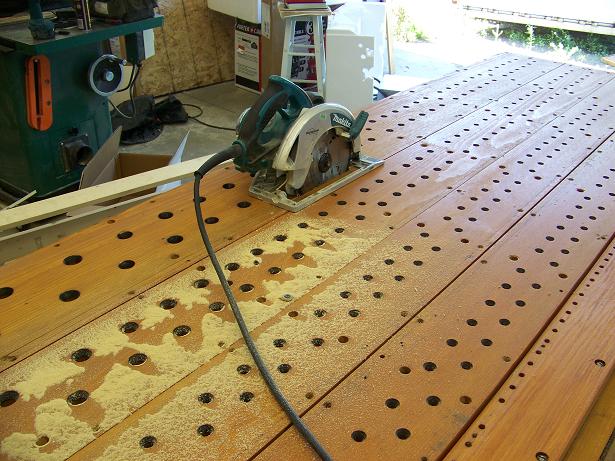
7/18/08
These are the various parts of the new wind chests after being cut and milled to the appropriate dimensions.
________________________________________________________________________________________________
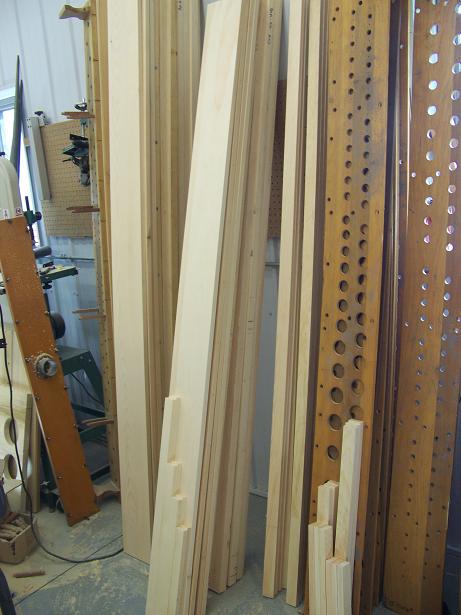
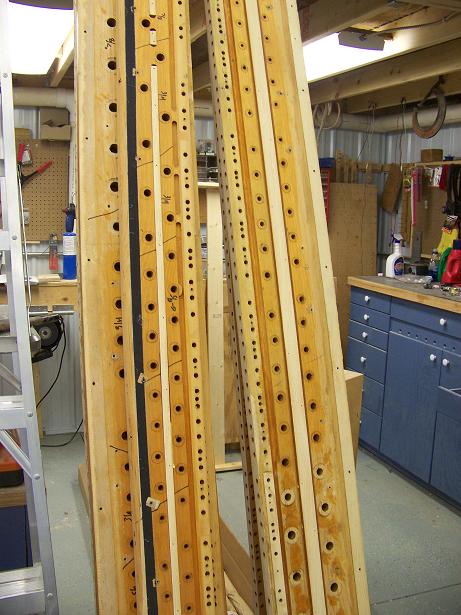
7/18/08
This is the raw lumber that will be used to construct the wind chest shells. The species of wood is white pine and only clear wood with no knots or other defects is used.
________________________________________________________________________________________________
7/15/08
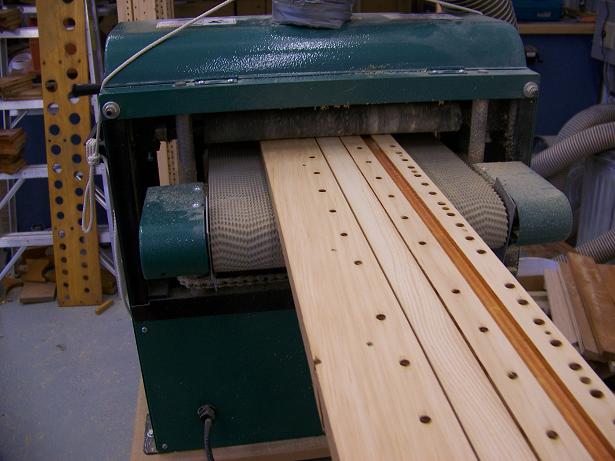
Here is one of the toe boards on its way throught the thickness sander. This machine is used to smooth out the underside of the board after the filler strips have been installed. It also removes any unwanted bits of wood or other blemishes left over from the dismantling of the windchests.
________________________________________________________________________________________________
7/15/08
Here is what the underside of the toe boards looks like after the grooves have been filled in to provide a smooth surface to which the new electric valves will be mounted. The light colored strips of wood down the center of the board were cut to fit from lumber which was recycled when the windchests were broken apart.
________________________________________________________________________________________________
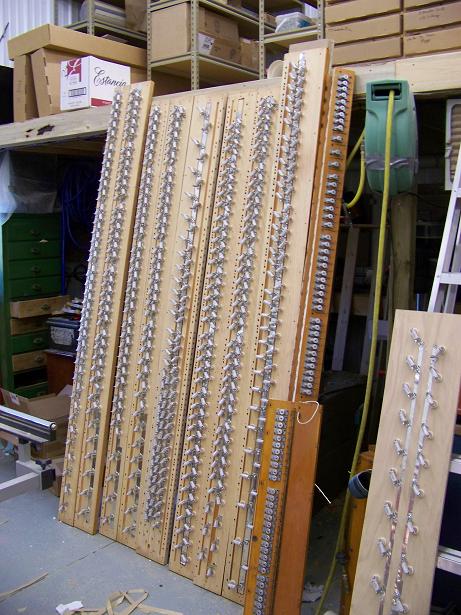
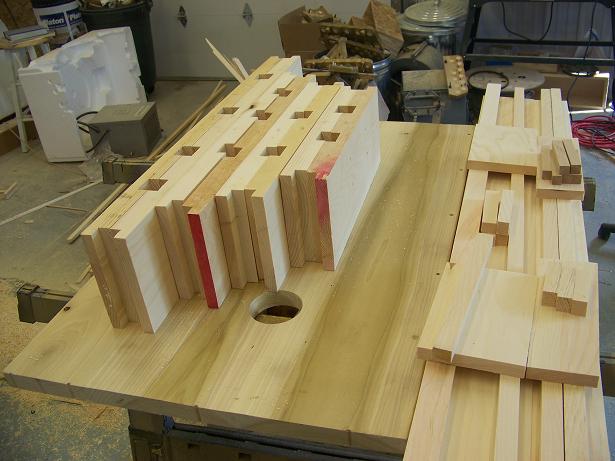
7/10/08
Here are the toeboards flipped right-side-up. This is what the top of the new windchests will look like. Each hole on this side will have a pipe standing on it when the organ is reinstalled.
_________________________________________________________________________________
7/10/08
Here are the boards for the 8' Open Diapason, 4' Octave, 2 2/3' Twelfth. and 2' Super Octave after being removed from the Great windchest. The donuts have been removed from the diapason board and you can see the grooves which will be filled in with wood to allow the mounting of the new electric valves. There are 4 windchests like this in the organ and each will require the same operation to remove the toeboards. In building new windchests for the organ, about 1" can be removed from the width of each toeboard and the primary action will not be reused thereby providing a little extra room in the organ chamber.
____________________________________________________________________________________________
7/10/08
Here is the toeboard for the 8' Open Diapason after being freed from the chest rails. The little wooden donuts will be removed and a slip of wood fabricated to fill in the wind grooves that are routed in the underside of the toeboard. Them the whole thing will go through the thickness sander to make the bottom nice and smooth for the installation of the new electric valves.
_____________________________________________________________________________________________
7/10/08
The existing toeboards will be recycled as part of the new windchests. Unfortunately Moller glued the toeboards onto their windchests and they have to be sawed off in succession from left to right. As each board is removed the chest frame has to be sawed off in order to get to the next toeboard.
____________________________________________________________________________________________
7/10/08
Today the Moller windchests were disassembled. This is the Great wind chest. The next pictures
detail the disassembly of this chest.
_____________________________________________________________________________________________________________________
7/7/08
Here is the console after all the old machinery has been removed. The console shell was left on site for the church to have
refinished. The new equipment will be installed onsite in late August.
_________________________________________________________________________________________________________________
7/7/08
This is the main swell windchest as it is being removed from the swell chamber. The existing toeboards and rackboards will be removed and fitted to a new windchest shell with new electric action magnets mounted on them thereby eliminating the failing electro-pneumatic action.
______________________________________________________________________________________________________
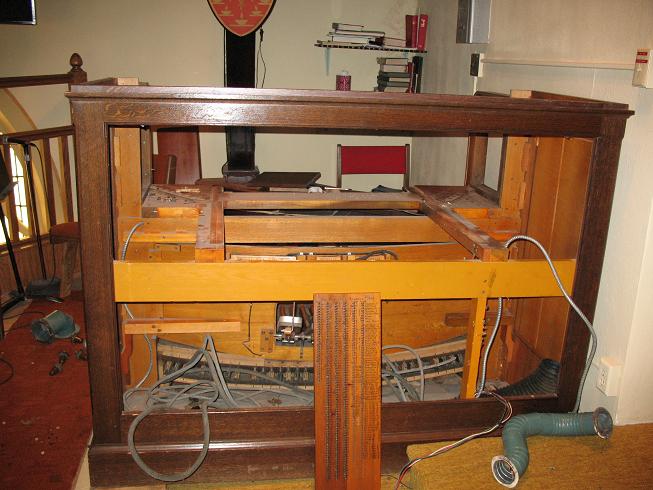
7/7/08
This is the inside of the console prior to gutting. All of the old electro-pneumatic switching will be replaced with
solid state electronics which will also provide all the modern conveniences like MIDI, mulit-level memory system, transposer, and automatic pedal.
_________________________________________________________________________________________
7/7/08
This was taken in the Great/Choir chamber as we were taking the pipes off the windchest. The pipes are, from right to left, 8' Harmonic Flute, 8' TC Unda Maris, 8' Gemshorn, and the 8' Clarinet goes in the empty row on the left. The pipes of the 16' Open Diapason are visible at the far left.
------------------------------------------------------------------------------------------------------------------------------------------
7/7/08
S P E C I F I C A T I O N S
for the restoration of a
3 manual and pedal pipe organ
located in
Trinity Lutheran Church
Thief River Falls, MN
Remove all of the pipes from the organ and store in protective trays on site.
Transport all the windchests of the organ to the Moe Piano & Organ Co. shop where the existing toe boards and rack boards will be fitted to new shells with new electric action. This will eliminate the failing pneumatic action.
Transport the existing console to the Moe Piano & Organ Co. shop for restoration and improvement as follows.
Install a new solid-state electronic coupler and MIDI system.
MIDI system includes a Viscount RD70 sequencer to provide record and playback of the organ.
Install new silver key contacts on the present manual keyboards.
Install new silver contacts on the present pedal board.
Install new stop actions with new engraved stop knobs/tabs in the present stop jambs and tablet board to accommodate the new stoplist.
Install a new solid-state electronic combination memory system including new keyslips and new pistons as follows.
6 pistons affecting the Swell stops
Swell cancel
6 pistons affecting the Great stops
Great cancel
6 pistons affecting the Choir stops
Choir cancel
6 pistons affecting the Pedal stops (duplicated by toestuds)
Pedal cancel
12 general pistons affecting the entire organ (7-12 duplicate by toestuds)
General cancel
Great to Pedal reversible piston and toestud
Swell to Great reversible piston
Choir to Great reversible piston
Sforzando reversible piston and toestud
Programmable Crescendo sequence
128 levels of memory protected by password
Install new MIDI sustain toestud
Clean, adjust and repair as necessary the present manual keyboards and pedal board.
Install new 12 position transposer
Install new digital control panel for MIDI, Transposer, and Combination Action functions.
Install a new solid-state rectifier in the console to operate the new stop controls.
Transport the existing static regulator from the blower room to the Moe Piano & Organ Co. shop for restoration.
Deliver the restored console, windchests, regulator and pipes to the church and install along with the following.
New solid-state electronic relay system to control the pipes according to the new stoplist.
2 new electric swell shade operators and linkages.
Up to 50’ of new main cable between the console and the organ chambers.
New electric chime action.
New solid-state rectifier.
Clean the entire organ including all pipes, framing, floors, and other parts.
Check and adjust as necessary the voicing of every pipe in the organ to return it to its original volume and tone.
Adjust the tremolos as necessary to suit the organist’s taste. This is limited to what can be accomplished with the present pneumatic tremolos
Analysis of pipework
Great
16’ Open Diapason – 73 pipes
4’ Octave – 61pipes
2 2/3’ Twelfth – 61 pipes (currently part of II Mixture)
2’ Super Octave – 61 pipes (currently part or II Mixture)
Choir
16’ Stopped Diapason – 85 pipes
8’ Harmonic Flute – 73 pipes
8’ Gemshorn – 73 pipes
4’ Gemshorn Celeste – 49 pipes
8’ Clarinet – 61 pipes
Chimes – 21 tubes
Swell
16’ Rohr Flute – 97 pipes
8’ Geigen Diapason – 73 pipes
8’ Viole – 61 pipes
4’ Viole Celeste – 49 pipes
8’ Trumpet – 73 pipes
8’ Oboe – 61 pipes
New Stoplist
Great Organ
8’ Open Diapason 61 pipes
8’ Harmonic Flute 61 pipes
8’ Gemshorn (ch)
8’ Unda Maris TC (ch)
4’ Octave 61 pipes
4’ Flute 12 pipes
2 2/3’ Twelfth 61 pipes
2’ Super Octave 61 pipes
IV Mixture 1 1/3’ (from 2 2/3 and 2)
8’ Trumpet (sw)
Great to Great 4’
Swell Organ
16’ Rohr Bourdon
8’ Geigen Diapason 61 pipes
8’ Rohr Flute 61 pipes
8’ Viole 61 pipes
8’ Voix Celeste TC 49 pipes
4’ Geigen Octave 12 pipes
4’ Flute 12 pipes
2 2/3’ Nazard
2’ Flautino 12 pipes
8’ Trumpet 61 pipes
8’ Oboe 61 pipes
4’ Clarion 12 pipes
Tremolo
Swell to Swell 16’
Swell Unison Off
Swell to Swell 4’
Choir Organ
8’ Stopped Diapason 61 pipes
8’ Gemshorn 61 pipes
8’ Unda Maris TC 49 pipes
4’ Harmonic Flute 12 pipes
4’ Spitz Octave 12 pipes
2’ Piccolo
1 1/3’ Larigot
1’ Fife
8’ Clarinet 61 pipes
Tremolo
Choir to Choir 16’
Choir Unison Off
Choir to Choir 4’
Pedal Organ
32’ Resultant
16’ Open Diapason 12 pipes
16’ Bourdon 12 pipes
16’ Rohr Bourdon 12 pipes
8’ Octave Bass
8’ Bass Flute
4’ Choral Bass
8’ Trumpet (sw)
Couplers
Great to Pedal 8’
Great to Pedal 4’
Swell to Pedal 8’
Swell to Pedal 4’
Choir to Pedal 8’
Choir to Pedal 4’
Pedal MIDI
Swell to Great 16’
Swell to Great 8’
Swell to Great 4’
Choir to Great 16’
Choir to Great 8’
Choir to Great 4’
Great MIDI
Automatic Pedal
Great Tremolo
Swell to Choir 16’
Swell to Choir 8’
Swell to Choir 4’
Great/Choir Transfer
Choir MIDI